Quick Start
 KoolMoves takes an approach to Flash™ movie creation that is in tune with the animation process, because it was designed by a professional animator. It is a mature animation package with ease of use and power as guiding principles. To make animations in KoolMoves all the user has to do is draw or import shapes or images and then reposition, reshape, and recolor the animation objects in adjacent key frames to achieve the look you want. KoolMoves automatically morphs shapes in between each of the shapes you create to achieve smooth animated motion. It's like putting together a cartoon strip. Each frame contains text, images, shapes, sounds, and actions. For character animation, one frame would have the characters in one pose and in the next frame in another pose.
The help is written primarily for the advanced/cartooning user interfaces. There is extensive context help on major screens. Look for ![]() usually in the upper left corner of a screen.
usually in the upper left corner of a screen.
Skill Level Interfaces
In the interest of presenting to the user the easiest user interface for his skill level, KoolMoves has four user interfaces styles. The user can select which user interface he wants to use from the right of the top toolbar and also in File > Preferences > View.
The following table identifies the mapping between functionality and the 4 interface styles.
|
Wizards |
Basic |
Advanced |
Cartooning |
Banner wizard |
x |
|
|
|
x |
|
|
|
|
x |
x |
x |
x |
|
Full set of drawing tools |
|
|
x |
x |
|
|
x |
x |
|
|
|
x |
x |
|
|
|
x |
x |
|
|
|
x |
x |
|
|
|
x |
x |
|
|
|
|
x |
|
|
|
|
x |
Basic Skill Level Toolbars
Shown below are the toolbars for the Basic skill level with icon explanations.
↓Score/timeline |
↓Interface styles |
↑Shape and text properties |
← Select/move shape and text objects on the drawing canvas |
|
← Insert text effects templates, buttons, clip art, web interfaces |
|
← Insert text |
|
← Insert image (photo) |
|
← Draw ellipse/circle |
|
← Draw rectangle/square |
|
← Apply effects to selected shape and text objects |
|
← Resize selected shape and text objects |
|
← Apply color/gradient/image fills to selected objects |
|
↓Elapsed movie time |
↓Play movie |
↑Current key frame |
↑Frame navigation |
↑Copy key frame |
Advanced Skill Level Toolbar
Shown below is the tools toolbar for the Advanced skill level with icon explanations.
Select/move objects → |
← Select/move points |
|
Insert image, etc. → |
← Insert text (regular or dynamic) |
|
Create movie clip → |
← Insert library item |
|
Insert component → |
← Draw standard shapes (e.g., circle) |
|
Draw point by point → |
← Draw freehand |
|
Draw line → |
← Add curve |
|
Add point to shape → |
← Delete point |
|
Apply transform → |
← Apply fill (color, gradient, or image) |
|
← Options for selected tool |
||
 |
 Some of the toolbar icons have a submenu "drawer". Click on the small triangle on the toolbar icon or click on the toolbar and hold for a second to get the choices.
Most Important Tools
The following are the most important tools (displayed for the Advanced and Cartooning skill levels).
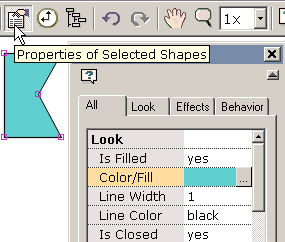
 1) A series of three tools, Shape Properties (shown here), Score/Timeline, and Movie Overview are located on the top toolbar. These allow you to view and edit animation objects and their properties.
 2) Copy this frame to create the next frame. One of the fundamental tasks of animation is copying the current frame as a starting point for creating the next frame. KoolMoves supports a fully WYSIWYG editing environment. The appearances of the shapes in each key frame are what you see in the Flash™ player (except for action script based effects). To repeat this important concept, the process of creating an animation involves 1) copying the current key frame to make the starting canvas for the next key frame, 2) making changes to the shapes in the new key frame, and so on.
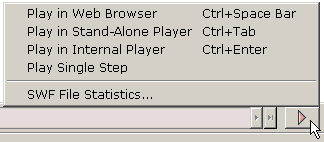
 3) Press the pink VCR-like play button to get a menu of four ways to play the animation. To export your animation as a Flash™ movie, just select File > Export Movie to create a Flash .swf file, a Flash .swf file with accompanying HTML, or to add a Flash animation to an existing web page. It is highly recommended that you read the help section on adding an animation to your web page.
Tutorials and More Help Topics
You can view examples created with KoolMoves by going to the Examples folder, in most cases located at C:\Program Files\Koolmoves\Examples.
Following this introduction, a number of topics are provided to guide you through the tasks associated with creating quality animations in KoolMoves and exporting them to the web.